
Setting up your guitar is such an important aspect of being a guitar player, yet it’s a skill that a lot of guitarists seldom pay attention to. Considered the work of the luthier or guitar tech, the guitar set up is often treated as an obscure science that only those who’ve studied and played the instrument for decades can manage to comprehend.
But the truth is with just a little bit of knowledge and some simple tools, even a newbie guitarist can set up their guitar to play like a dream. Giving your guitar a set up can transform a poorly playing instrument into an absolute shred machine, and take that beginner or intermediate level instrument to a whole new level. Learning to set up your guitar will also teach you more about how your guitar works on a component level, further helping your understanding of everyone's favourite instrument!

In this series of articles we’re going to be deep diving into each aspect of a good guitar setup, showing you all the tricks of the trade to get your guitar playing its absolute best!
Guitar Set Up Essentials
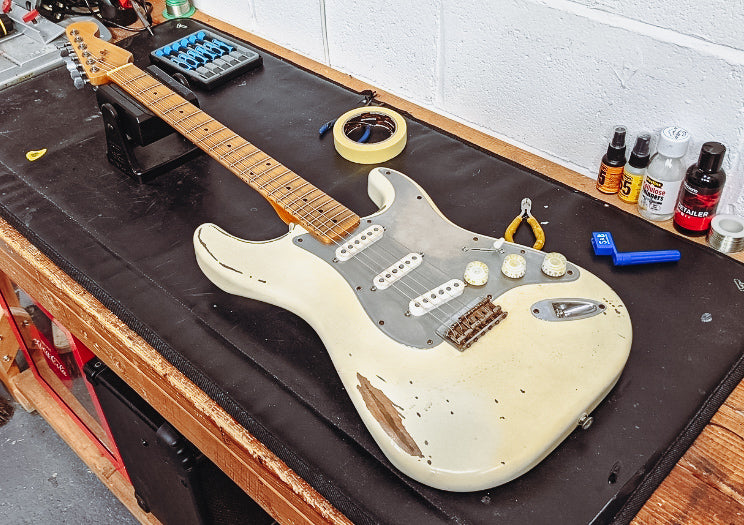
A lot of these tools are found in regular household toolboxes or are cheap to buy, so once you’ve added them to your arsenal you’ll be set for a good portion of your playing career. Some are renewables that you will have to update periodically, such as strings and cleaning materials, but all will serve you well in keeping your guitar in tip top condition.
- Guitar Tuner
- Allen Keys (Hex Wrenches)
- Ruler
- Nut Files
- Strings
- String Cutters
- Fretboard Oil
- Fret Polish
- Cleaning Cloths
- Screwdriver
- Body Polish
- Workbench Mat
- Neck Rest
Truss Rod Adjustment
We’re going to start with that most scary of guitar adjustments, the Truss Rod. A lot of guitarists are hesitant to make this change, fearing they will snap the neck of their guitar or cause irreparable damage but the truth is it’s actually quite easy to make this alteration yourself, and you’ll have to work pretty hard to break your guitar doing it.That said, it’s always best to proceed with caution, especially if you’re dealing with an older instrument. The hard and fast rule with Truss Rod adjustment is always to take it slow and steady, move in small increments and if in doubt, take it to a professional.
What is a Truss Rod?
Your Truss Rod is a metal bar that reinforces the neck of your guitar. On its own a guitar neck will bend under the pressure of your strings, so the job of the Truss Rod is to prevent this from happening. The Truss Rod typically runs from the Nut of the guitar to the heel of the Neck and can usually be accessed from the headstock of a guitar.

Some guitars will have the access point at the headstock, sometimes underneath a plastic sheath in the case of Gibson and Epiphone style guitars, or they may be hidden away in a recess in the case of Fender style guitars. On some electric guitars the adjuster will be where the neck joins the body (you may need to remove the neck in this instance - see the bottom of this article) and on Acoustic Guitars it's usually located just inside the sound hole.
Sighting the Neck
Before we commence with the adjustment, we’ll need to work out whether your guitar actually needs it in the first place. We’ll do this by ‘sighting’ the guitar neck to see if there is any curve in the neck. There are a couple of way to sight the neck of your guitar, you can do it by putting the body of the guitar on your foot and looking down the neck towards the bridge, you could also place it sideways on a table and look down the neck that way. Start with your high or low E and compare how the string runs parallel to the neck. Does it look like a straight line? Is the neck bowed away or towards the string?

If the neck is bending away from the strings, this is called Upbow, whereas if it’s too close to the strings then its Backbow. Sighting the neck is one of the quickest and easiest ways to determine if you require a Truss Rod adjustment, however it can take some time to learn what to look for, so we’ve got another test if you’re struggling to identify it this way.
The Tap Test
If you’re not sure from sight alone, or you just want to be doubly sure, there’s the Tap Test. Now bear with us because this one is a little convoluted! First you’re going to want to sit down with your guitar, or alternatively balance it on a table, looking down on it as if you were in the playing position. Now, fret the low E with your first finger of your fretting hand on the first fret. With your picking hand, use your pinky to fret a note as close to the neck joint as possible.

Once this is done, stretch your index finger further up the neck to press the string down directly onto a fret. Try to aim for somewhere between the 7th and 9th fret if you can reach, as this is where the bow of the neck will be the most obvious. If you can’t reach that far just stretch as far as you can! If it feels as though there is a large gap between the string and fret, then you have Upbow, if it’s the opposite and there’s no room between the string and the fret, then you have Backbow.
Upbow vs Backbow
Upbow will cause the string to be too far from the frets, which affects the playability of the guitar, making it more difficult to fret notes. Backbow causes the strings to get too close to the fretboard and will give you fret buzz, as well as causing the string to ‘choke’ out when bending.

If your neck looks straight, then you’re probably best leaving it be, but if it doesn’t we’ll need to correct it. Bear in mind that there is some personal preference at play here, and a little Upbow in a neck isn't going to make the guitar unplayable. There are some players who prefer a bit of Upbow on their guitars, as it can make it slightly easier to bend the strings.
How To Correct It
Look at the Truss Rod Adjustment Nut straight on, whether it's on your headstock or at the bottom of the neck where it meets the body.
To correct Upbow, you’ll need to tighten the Truss Rod by turning it clockwise or as it's better known 'righty-tighty'.
To correct Backbow, you’ll want to loosen your Truss Rod by turning it anti-clockwise or 'lefty-loosey'.

You will need to retune the guitar between each turn of the Truss Rod to ensure the same amount of pressure is being applied to the neck when you sight or do the tap test. How many turns you need will vary greatly between different guitars, so just be sure to go with quarter turns or less, and never force the Truss Rod to turn if it feels like there’s a lot pressure there.
Top Tips
If you feel excessive resistance then your Truss Rod could well be ‘maxed’, in which case you should take it to a luthier for further inspection. To continue turning in this instance may well result in a broken Truss Rod and that is not a five minute repair!
On some guitars the neck may take time to settle after adjusting the Truss Rod, so if you’re turning but finding nothing is happening, leave the guitar to settle and come back to see if any changes have occurred. If not, it’s probably best to take it to your local guitar tech.
Lastly, but certainly not least, always make sure you’re using the correct size adjustment tool for your Truss Rod. If you’re not sure of the size you’ll need to speak the manufacturer of the guitar. But trust us if you use something that doesn’t quite fit, you’re in danger of stripping the Hex End of your Truss Rod and again, that is not an easy repair!
Adjusting the Truss Rod at the Body End
Sometimes with Fender Guitars the Truss Rod Adjustment Nut is located where the body meets the neck, so you will need to remove the neck to make any adjustments. This is not actually that difficult to do, although if you feel that it's a little beyond your reach then take the guitar to your local guitar tech. If you do want to have a go yourself, these are the steps:
1. Loosen the strings to the point they're about to come off the tuning posts - you can put a capo on the first fret to prevent them slipping out of the nut if you like.
2. Assuming it's a four bolt neck plate, loosen the two screws furthest away from the headstock by about 80%.
3. Now loosen the two screws closest to the headstock by about 50%.
4. Now for the scary bit, with the screws loose on the neck plate, you will be able to 'tilt' the neck out of the neck pocket, exposing the Truss Rod Adjustment screw or Hex nut.
5. Turn the adjustment screw, no more than a 1/8 or 1/4 turn in the direction you need.
6. Reattach the neck and re-tighten the strings before tuning back to pitch. You may need to wait for the neck to 'settle' before you notice any change so wait and see what happens before adjusting again. Some people like to leave it 24 hours, especially on a Fender neck with the vintage-style heel.
In Conclusion
Making your own Truss Rod Adjustment isn’t something you need to be afraid of, but it does require a gentle hand to ensure the best outcome for your instrument. Follow the steps in this guide carefully and you can have your guitar playing better than ever and as always, if you're in doubt then give us a shout!
Now that you're done adjusting your Truss Rod, you can move on to Adjusting your Action in Part 2 of our Guitar Set Up Guide.
Need gear? Check out our Luthier Tools, Guitar Maintenance Gear and Truss Rods.
More in This Series
Part 1 - Truss Rod Adjustment
Part 2 - Adjusting the Action
Part 3 - Know Your (Guitar) Nuts
Part 4 - Keeping Things Clean
Part 5 - Intonation Adjustment
Part 6 - Pickup Height